


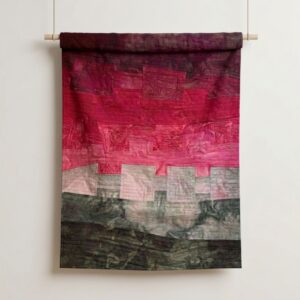
A quilt hanging badly on a batten. (AI image based on one of my own quilts – which I would never allow to hang so badly!)
I thought I would put together a few reflections of Festival of Quilts 2026.
This blog will not be full of images as I do not have the permission of any of the makers to share images of their quilts, and also, in order to illustrate the problems that I saw, I think it would be more fair to create samples to illustrate the issues – but, of course, time isn’t on my side! So I will just reflect!
Today (Wednesday 29th July), while volunteering as a Judge’s Aide during Judging Day, Festival of Quilts 2026, I was noticing more and more where incredibly beautiful, inspiring and creative quilts, failed to hang properly for two reasons. The first reason was that the hanging sleeve was too snug for the batten used, causing the quilt to bulge forwards over the batten. And the second was that quilts didn’t always hang straight. They curled up in one direction or another. So why is this happening?
When creating a hanging sleeve for a quilt, it is important to create it with a D-shaped profile so that it is the hanging sleeve that shapes itself around the batten, rather than the front face of the quilt that does so. I thought I had a little tutorial on my website, but apparently not! So I will add that as soon as I can. (Here, in the hotel for Festival of Quilts, the Wi-Fi isn’t letting me!)
I think that the key “metric” is to make your hanging sleeve large enough – if a competition entry form calls for a 4″ hanging sleeve, then make it 4½” or even 5″. And that means cutting your fabric for the sleeve twice the size you want PLUS the seam allowance PLUS and extra amount for the depth of the batten.
Most quilt shows use a ½” batten, so you need to add that in. So now we have 4″ (the finished size of the sleeve) +¼” (seam allowance), Double it, and add ½” for the depth of the batten – so now we are up to needing to cut a piece that is 9½”. But let’s just go for a round 10″ as a minimum. The side of the sleeve that is against the quilt wants to be 4½” and the loose side of the sleeve is 5″. In this way, the sleeve curves around the batten, and the quilt itself stays straight!
Brenda Gael Smith has a great tutorial on her website. You can find it here.
The second reason a quilt doesn’t always hang as beautifully as you’d hoped is something hidden right in the middle of it: the wadding.
Anyone who knows me will know I’m slightly obsessed with helping quilters understand why things happen. Earlier this week I gave a talk called The Unsung Hero, all about the remarkable variety of waddings now available and the difference they can make to the finished quilt.
It’s easy to think of wadding as simply the layer that makes a quilt warm, but it does so much more. It affects drape, weight, loft, stability and even how a quilt ages. A wadding that’s too stiff can leave a quilt feeling rigid, while one that’s too soft may allow it to sag or distort over time. Add in shrinkage, quilting density and thread choice, and it’s no wonder two quilts made from the same pattern can behave completely differently.
One of the biggest surprises is that more quilting isn’t always better. Every line of stitching changes the structure of the quilt, so the combination of wadding, thread and quilting design all plays a part in whether a quilt hangs gracefully or develops ripples, curls or stiffness.
There’s far more to this than I can cover here, so I think wadding deserves a blog series of its own. It’s one of the least glamorous parts of quilt-making, yet it has an extraordinary influence on the finished result—and understanding it can transform the way you choose materials for future quilts.




0 Comments
Trackbacks/Pingbacks